
|
|
Post Reply 
|
| Author | |
Andrew Rolland 
Moderator Group 

Go away rain Joined: 19-August-2004 Location: Scotland Status: Offline Points: 6579 |
 Post Options Post Options
") Thanks(0) Thanks(0)
 Quote Reply Quote Reply
 Topic: E60 545i Spark Plug Replacement Topic: E60 545i Spark Plug ReplacementPosted: 28-March-2011 at 10:20 |
|
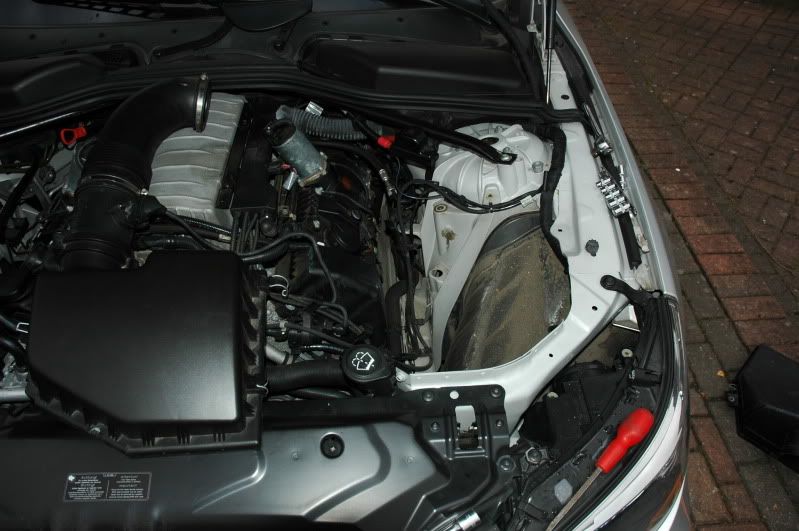
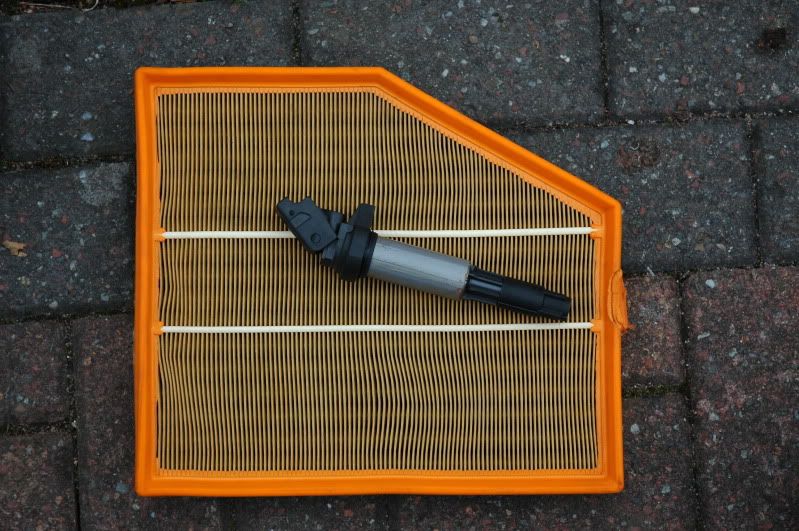
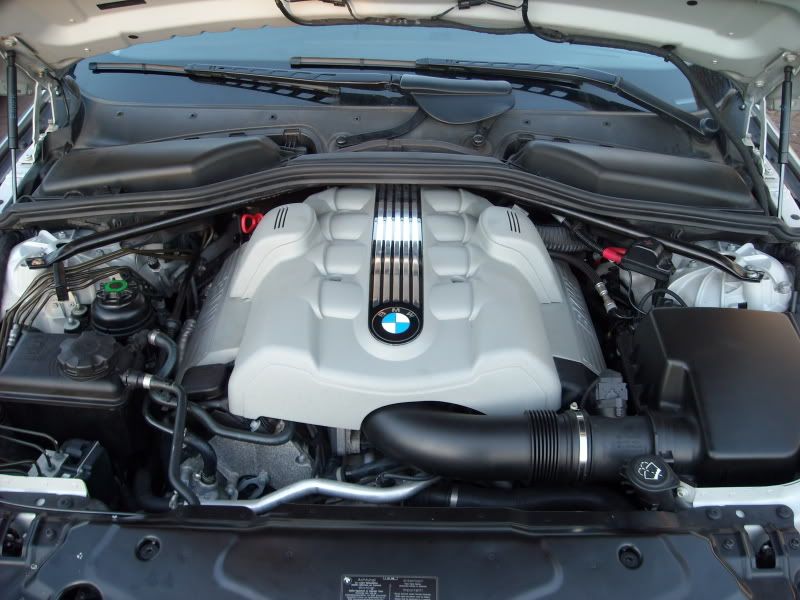
After 62,000 miles and nearly 7 years the iDrive told me it want the spark plugs changing. The last time the spark plugs saw light of day was on the assembly line in Bavaria in May 2004. Bought 8 plugs and an air filter from BMW Harry Fairbairn in Glasgow, who very kindly came me about 15% discount. You will need to following E6 TX Star 3/8" drive and my dad to help.... For reference, cylinders #1 to #4 are on the offside of the car and cylinders #5 to #8 are on the nearside of the car. I was worried about cross threading the new plugs putting them back in the bores but following a poke around under the bonnet on Friday night I was more worried about how to access the back two plugs. Following a search on line, there appears to be a real issue in accessing spark plugs for cylinders #4 and #8 which are right back at the bulkhead where the chassis rails/legs start to narrow making access tricky at best! I removed the pollen filters and splash shelf that sits at the rear of the engine bay. To remove this follow instructions here Remove the engine acoustic cover and the two plastic cylinder head over covers. This now exposes the tops of the ignition coils and the clips that hold them in place. To improve access to cylinders #5 to #8 I also removed the air box. I slackened the jubilee clip on the inlet manifold and pulled off the air duct. I then sat this duct still attached to the top of the air box on the inlet manifold.
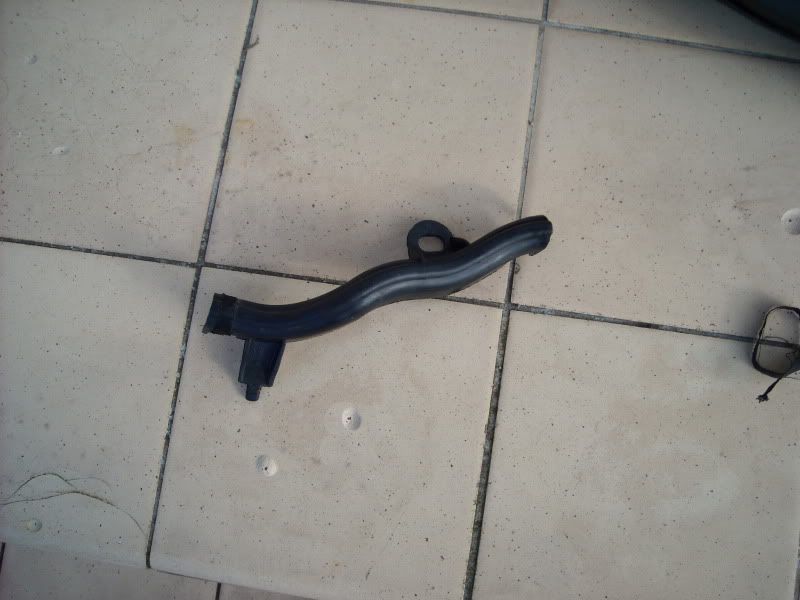
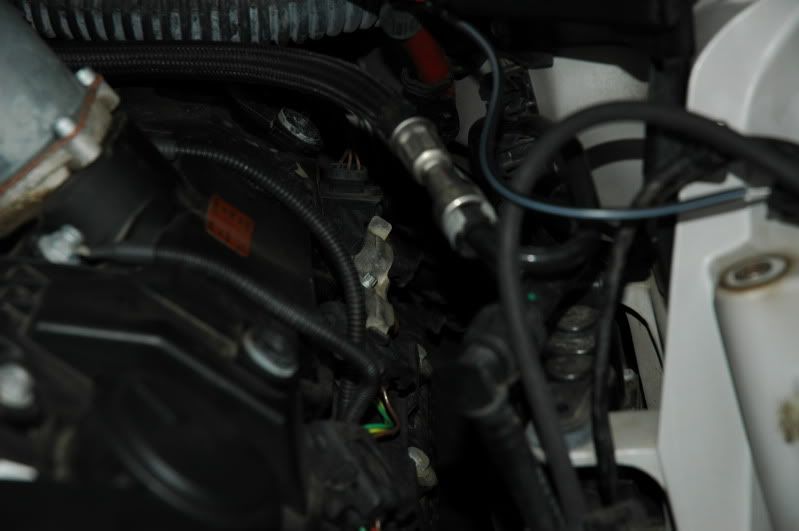
A collection of just some of the bits I removed! I placed a rag along side each cylinder head below the coils in the gap between the engine and the chassis rails to catch any small components if I dropped them. It would fall under the engine making recovery difficult. I also removed the black plastic housing that retains one of the positive battery leads. This is all to get access to get the rather long HT coil out from cylinder #8 right at the back, under the main engine electrical cables, the fuel line and the strut brace.
Undoing the plastic nut holding the cable housing
..and the cable housing removed
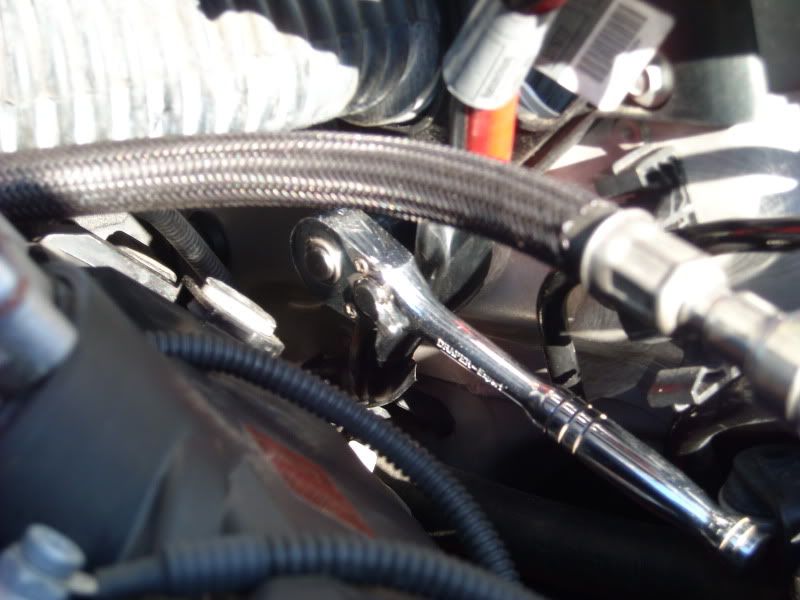
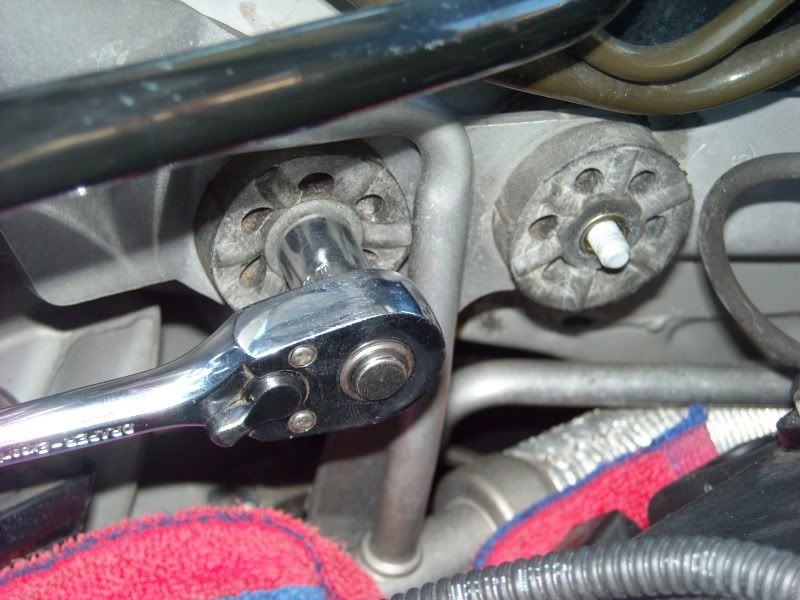
Engine bay in the process of stripping out. So now you can get in with the 3/8" drive ratchet and E6 TX star socket to remove the clip that holds the HT coils for cylinders #7 and #8. I had to go and buy this ratchet as there isn't enough room for my 1/2" drive ratchet plus the 1/2" to 3/8" converter.
Clip retaining HT coils #7 and #8. At the bottom of the photo you can see the top of HT coil #6, I had already removed its clip. The HT coils have a clip that retains the cables. This clip may need to be prised upwards with a flat screwdriver. When the clip is lifted up it moves out the connector plug. Nice bit of design that. The HT coil was difficult to remove from cylinder #8 but we got there. The coils are quite firmly held in place over the spark plugs and took at bit of work to remove. The coils are really quite long which makes them the tricky to remove.
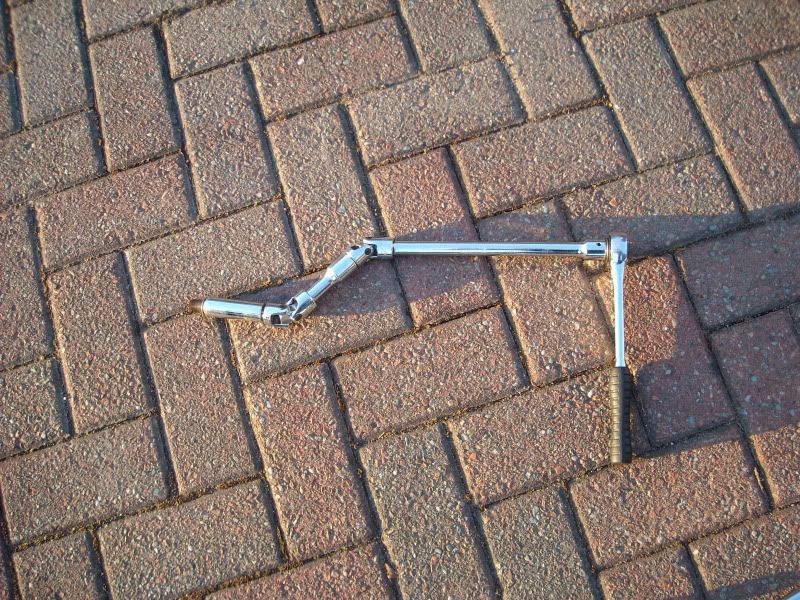
In order to get to the spark plugs I needed to make up the socket drive arrangment shown below
10 mm spark plug socket, universal joint, 3" extension bar, another universal joint followed by a 10" extension. This flexible arrangment could be fed into the bores quite easily.
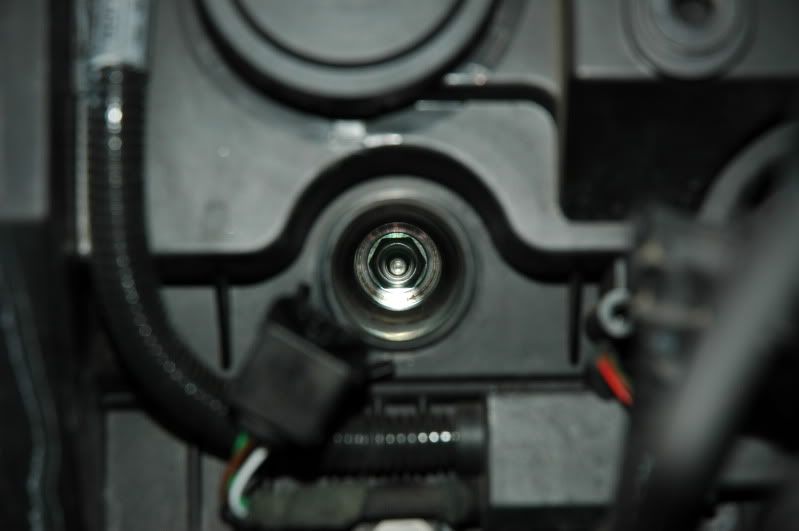
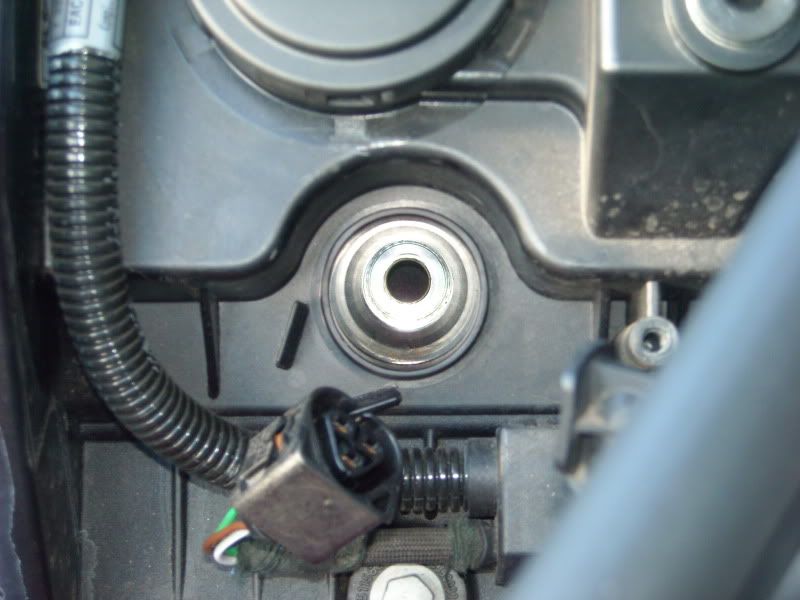
Cylinder #5 spark plug in bore
Looking into the engine, cylinder #5
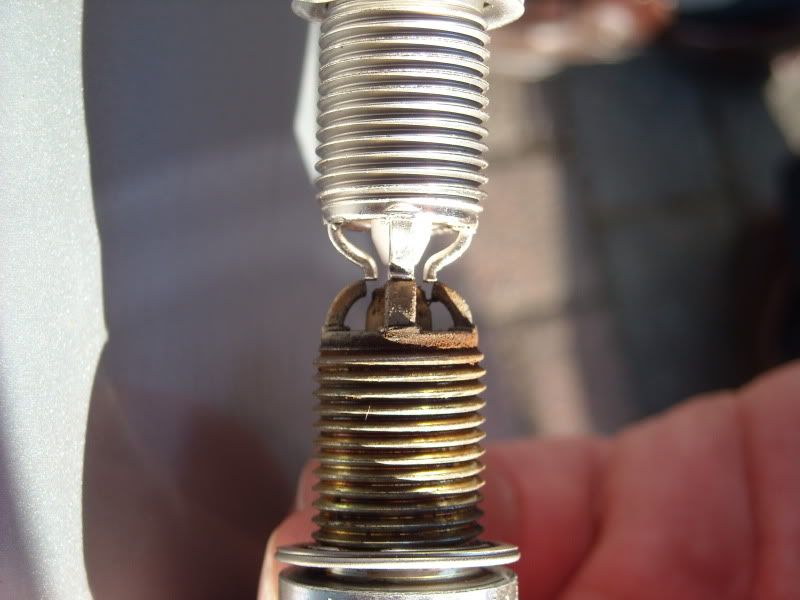
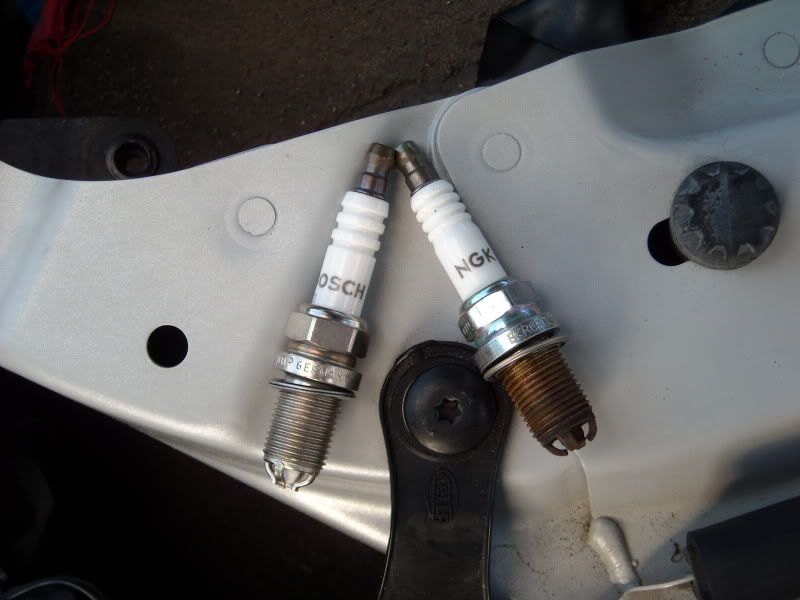
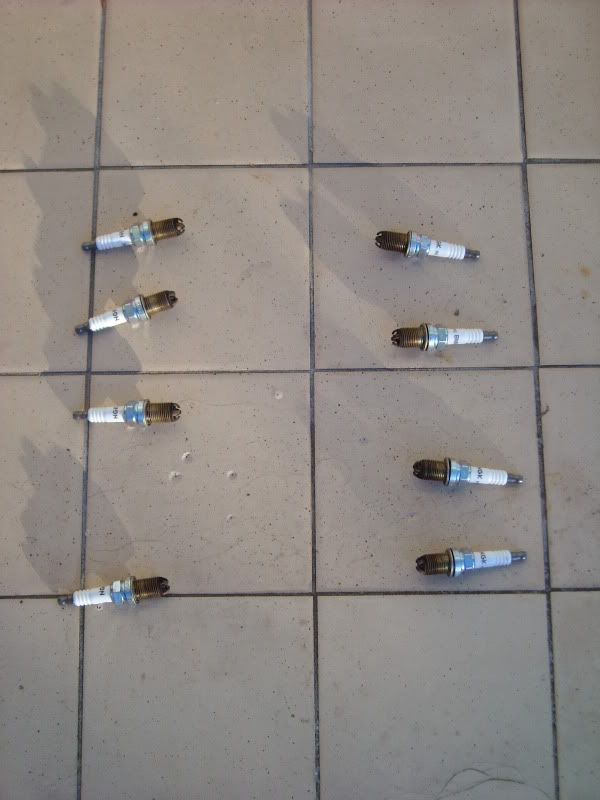
You can see the wear on the old plugs.
Old plugs were NGK, new BMW plugs are Bosch. In order to access the plug on cylinder #4,
you have to remove the two 10 mm nuts that secure the air conditioning lines to the chassis rail. There are two bushes that sit over the studs to protect the rubber mounts.
I was able to recover one of the bushes and the other stayed within the rubber mount. You then have to pull the air conditioning lines from the chassis leg and then once free of the studs push in down. I also had to persuade the brake lines to move a bit to give a bit more room to withdraw the HT coil. The new spark plugs are torqued to 30Nm with no grease.
All eight old spark plugs removed.
Put it all back together and test, then re-set the iDrive. Including head scratching time (working out how to access cylinders #4 and #8) and a bit of stripping out work the day before, it probably took me and my dad about 4 hours to do. But we were being extra careful and having to stop and figure out access etc. Parts cost me �95 inc VAT, labour cost a few beers. What would BMW have charged me labour for that, �100? �150? Plus parts at full price �10.20 per plug and �29.92 for the air filter. Andrew |
|
|
Be exclusive and drive a Petrol 5 Series!
Current '13 62 F10 535i MSport Auto Previous '04 04 E60 545i SE Auto '03 53 E60 545i SE Auto (Stolen) '98 S E39 523i SE Auto |
|
 |
|
| Sponsored Links | |
|
|
|
UweM3
Moderator Group

Joined: 11-February-2003 Location: United Kingdom Status: Offline Points: 5445 |
Post Options
Thanks(0)
Quote Reply
Posted: 28-March-2011 at 10:26 |
|
It's mad what you have to do these days for just replacing the spark plugs.
Or a head light bulb on some cars. But I don't think it's that much wear on the plugs as you may think in your comparision picture. These are two different designs of plugs from two different manufacturers. |
|
|
E61 520d, slow and buzzy but my wallet likes the mpg.....
|
|
|
|
|
ThosH
Advanced Newbie 
Joined: 08-July-2010 Status: Offline Points: 20 |
Post Options
Thanks(0)
Quote Reply
Posted: 28-March-2011 at 10:40 |
|
Hi Andrew, wonderful description & photos -- you won't be idle if you decide to turn to photography!
I recall exchanging messages with you some time ago re a suggestion of using a piece of hose pipe to put plug in place, which would guard against cross-threading. Did ye use anything like that? ThosH |
|
|
|
|
Sporty1
Really Senior Member II

Joined: 18-October-2006 Location: Hertfordshire, United Kingdom Status: Offline Points: 2297 |
Post Options
Thanks(0)
Quote Reply
Posted: 28-March-2011 at 13:16 |
Agreed. |
|

Sport Evolution Schwarz #043 |
|
|
|
|
Andrew Rolland
Moderator Group
Go away rain Joined: 19-August-2004 Location: Scotland Status: Offline Points: 6579 |
Post Options
Thanks(0)
Quote Reply
Posted: 28-March-2011 at 22:28 |
|
Thanks and No My first worry was about cross threading the plugs, hence the previous post where you advised, but on investigation on Saturday afternoon, fears of cross threading left my train of thought and my thoughts then turned to 'how the chuff am I going to get to the two back plugs!" The plugs all went in fine, one didn't quite feel right when hand turning it in so I turned the socket set adapters back a turn or so and tried again and I felt a positive engagement in the thread. Spark plug was put in the spark plug socket then the whole socket, universal joints and extension bars were fed into the recess and turned by hand. It's the access that was a killer on this job, but it was most satisfying to have done the job myself. Now driven about 40 miles since the change and the engine just somehow feels fresher, might even have a slight improvment in mpg too. Will keep you posted. Andrew |
|
|
Be exclusive and drive a Petrol 5 Series!
Current '13 62 F10 535i MSport Auto Previous '04 04 E60 545i SE Auto '03 53 E60 545i SE Auto (Stolen) '98 S E39 523i SE Auto |
|
|
|
|
ThosH
Advanced Newbie
Joined: 08-July-2010 Status: Offline Points: 20 |
Post Options
Thanks(0)
Quote Reply
Posted: 28-March-2011 at 22:48 |
|
Andrew,
Ye did very well & it's so satisfying to be able to identify access to awkward spots. For a newbie like me, this is the real value of this forum -- thanks! ThosH |
|
|
|
|
Post Reply
|
|

|
| Forum Jump | Forum Permissions You cannot post new topics in this forum You cannot reply to topics in this forum You cannot delete your posts in this forum You cannot edit your posts in this forum You cannot create polls in this forum You cannot vote in polls in this forum |


 E60 545i Spark Plug Replacement
 Topic Options
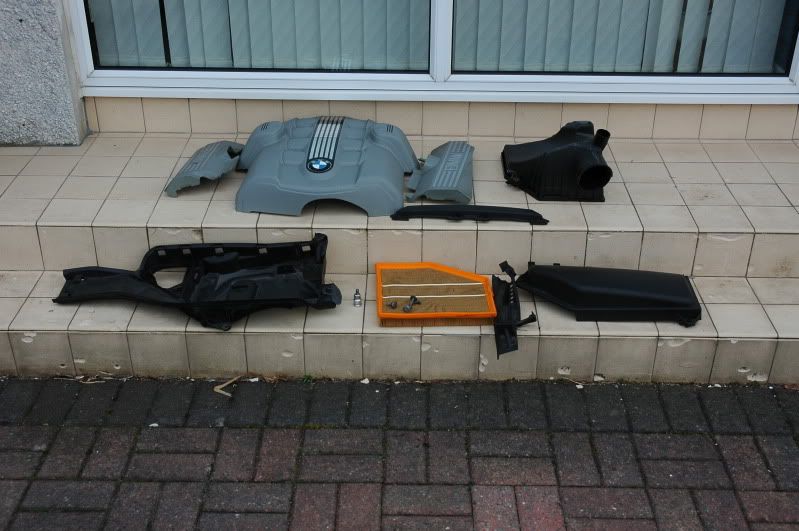

 UweM3 wrote: